If you're a true chocolate lover, there's something incredibly satisfying about creating your own homemade chocolate. The process allows you to customize the flavors, experiment with different ingredients, and indulge in a truly unique chocolate experience. Whether you're a seasoned chocolatier or a curious beginner, making your own chocolate opens up possibilities and creativity.
In a surprising yet not-so-surprising twist, chocolate-making is remarkably easy! Below, you will learn a step-by-step process of how to make chocolate and make your own chocolate bars in the comfort of your own home.
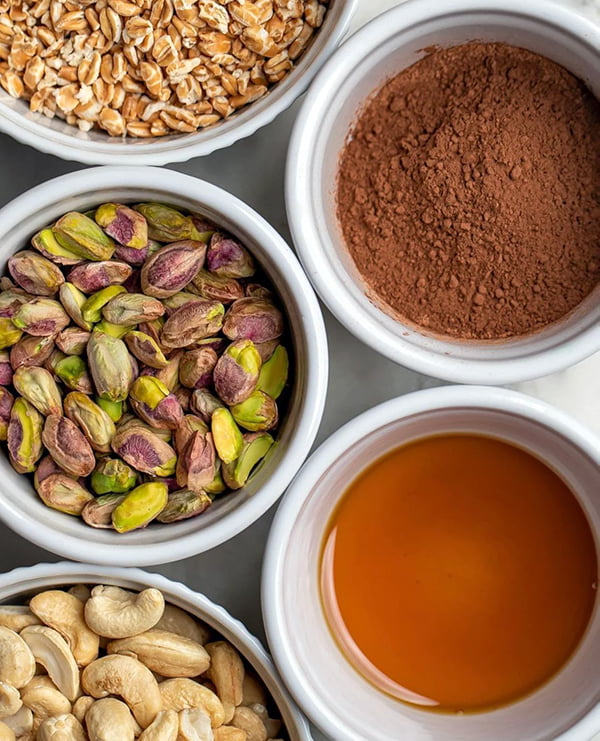
How To Make Chocolate (Healthy & Delicious)
Prep Time
5 minutes
Cook Time
5 minutes
Rest Time
30 minutes
Total Time
40 minutes
Ingredients
Directions
1. Carefully heat the solid coconut oil until it melts.
2. Combine the cocoa powder and coconut oil in a medium-sized bowl.
3. Mix the maple syrup or honey to the bowl. Adjust the sweetness to your preference by adding more or less sweetener.
4. If preferred, you can include a pinch of sea salt, a dash of vanilla extract, or any other desired flavorings. Mix until the ingredients are well combined.
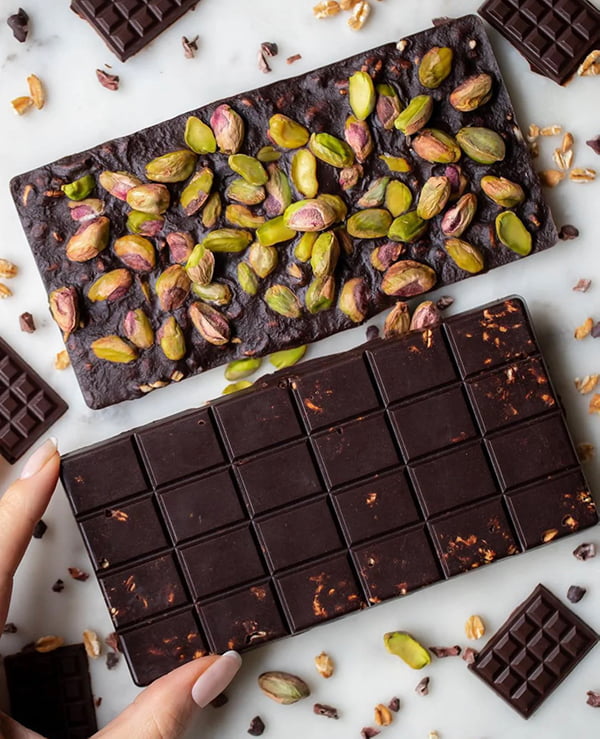
5. Homemade chocolate bar: Line a baking dish or tray with parchment paper. Transfer the chocolate mixture to the dish and evenly spread it using a spatula.
6. Homemade chocolate shapes: Pour the mixture into chocolate bar shapes.
7. Place the dish in either the refrigerator or freezer to let the chocolate solidify. Typically, this process takes around 1-2 hours in the refrigerator or 30-45 minutes in the freezer.
8. After the chocolate has fully hardened, take it out of the refrigerator or freezer and break it into small pieces or cut it into your preferred shapes.
9. Your healthy homemade chocolate is now ready to be enjoyed! Store it in a sealed container in the refrigerator to preserve its freshness.
Tips & Notes
Swap Cacao Powder for Cocoa Powder: When opting for cocoa, you’re embracing a more traditional, tried-and-tested route. Cocoa powder, processed at higher temperatures, offers a milder, sweeter chocolate flavor and integrates seamlessly into recipes, providing a consistent, rich taste and smooth texture. It’s also more readily available and budget-friendly compared to cacao powder.
Conversely, cacao powder, less processed and closer to the raw state of the cacao bean, retains a higher level of antioxidants, minerals, and flavonoids, making it a healthier choice. It imparts a more intense, slightly bitter chocolate flavor, which can add depth and complexity to your chocolate creations. However, this comes with a higher price tag and can be more challenging to find in regular grocery stores.
Nutritional Facts
Nutrition Facts
Servings: 6
Calories
164
% Daily Value*
Total Fat 14.7g
19%
Saturated Fat 8.7g
43%
Cholesterol 0mg
0%
Sodium 1mg
0%
Total Carbohydrate 17.8g
6%
Dietary Fiber 8g
29%
Total Sugars 4g
Protein 5.3g
Vitamin D 0mcg
0%
Calcium 31mg
2%
Iron 2mg
14%
Potassium 14mg
0%
*The % Daily Value (DV) tells you how much a nutrient in a food serving contributes to a daily diet. 2,000 calorie a day is used for general nutrition advice.
How to make Dark Chocolate
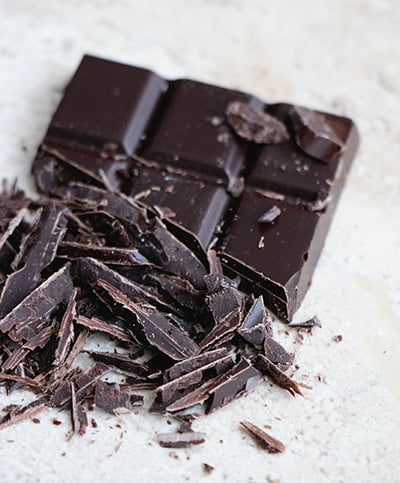
To make dark chocolate at home, you will need cacao powder, a sweetener of your choice, a fat source, and, optionally, vanilla extract or other flavorings. Because cacao powder is less processed than cocoa powder, it has a slightly bitter chocolate flavor that is typically found in dark chocolate.
Prep Time
5 minutes
Cook Time
5 minutes
Rest Time
30 minutes
Total Time
40 minutes
Ingredients
Directions
1. To transform the fat source into a liquid state, use a double boiler or place it in a microwave-safe bowl and heat it until it melts.
2. In a different bowl, blend the melted fat with the cocoa or cacao powder until the mixture is thoroughly combined and has a smooth consistency.
3. Slowly incorporate your preferred sweetener into the mixture, adjusting the quantity to reach your desired level of sweetness. Mix well to incorporate the sweetener into the chocolate mixture.
4. If preferred, add vanilla extract or other flavorings to enhance the taste. Stir the mixture to ensure they are well combined.
5. Depending on your dark chocolate's desired shape and size, pour the mixture into a chocolate bar mold or onto a baking sheet lined with parchment paper.
6. Using a spatula, ensure the chocolate's surface is smooth and evenly distributed.
7. Place the molds or baking sheet in the refrigerator or freezer to let the chocolate set. The duration may vary depending on the thickness of the chocolate, but it typically takes approximately 30 minutes to an hour.
8. After the dark chocolate has hardened, remove it from the molds or break it into smaller pieces using a baking sheet.
Tips & Notes
Adjust Cacao Powder: Cacao powder is ideal for making dark chocolate because it is less processed and retains a higher concentration of cacao solids, essential for dark chocolate's rich, intense flavor. The minimal processing of cacao powder means it maintains more of the natural compounds found in the cacao bean, such as antioxidants, flavonoids, and theobromine, contributing to dark chocolate's deep, robust flavor and health benefits.
Nutritional Facts
Nutrition Facts
Servings: 4
Calories
272
% Daily Value*
Total Fat 23g
29%
Saturated Fat 6.6g
33%
Cholesterol 25mg
8%
Sodium 554mg
24%
Total Carbohydrate 13g
5%
Dietary Fiber 2.7g
10%
Total Sugars 7.3g
Protein 6g
Vitamin D 0mcg
"0%"
Calcium 178mg
14%
Iron 1mg
6%
Potassium 414mg
9%
*The % Daily Value (DV) tells you how much a nutrient in a food serving contributes to a daily diet. 2,000 calorie a day is used for general nutrition advice.
How To Make Milk Chocolate
To make milk chocolate at home, you will need cocoa or cacao powder, a sweetener of your choice, a fat source, milk powder (or soy milk powder), and optional vanilla extract or other flavorings.
Prep Time
5 minutes
Cook Time
5 minutes
Rest Time
30 minutes
Total Time
40 minutes
Ingredients
Directions
1. Melt the fat source (cocoa butter or a combination of cocoa butter and coconut oil) using a double boiler or by placing it in a microwave-safe bowl and heating it quickly until it becomes a liquid.
2. In a separate bowl, combine the melted fat with the cocoa powder or cacao powder and milk powder. Continuously stir the mixture until it achieves a smooth and thoroughly combined consistency.
3. Add the sweetener of your choice gradually, adjusting the quantity to attain the desired level of sweetness. Mix well to incorporate the sweetener into the chocolate mixture.
4. If desired, add vanilla extract or other flavorings to enhance the taste. Stir to combine.
5. Pour the mixture into a chocolate bar mold or onto a parchment-lined baking sheet, depending on your milk chocolate's desired shape and size.
6. Using a spatula, carefully spread the chocolate to ensure a smooth and even surface.
7. Put the molds or baking sheet in the refrigerator or freezer to let the chocolate solidify. The duration will vary based on the thickness of the chocolate, typically taking around 30 minutes to an hour.
8. After the milk chocolate has completely solidified, extract it from the molds or break it into smaller pieces using a baking sheet.
Tips & Notes
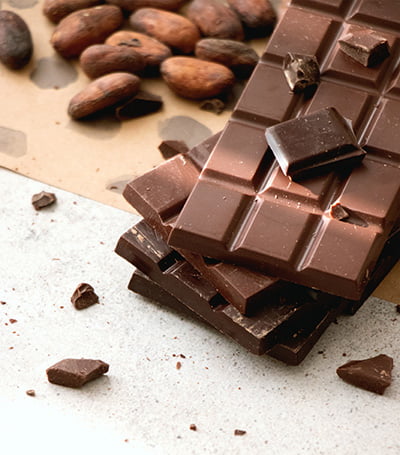
Use Milk Powder: Use milk powder and not liquid milk from your fridge. Milk powder helps maintain the desired texture and consistency of the chocolate. Liquid milk contains a significant amount of water, which can affect the smoothness and shelf stability of the chocolate. On the other hand, milk powder adds milk solids without introducing excess moisture, resulting in a smoother and creamier texture.
Cocoa or Cacao: Cocoa powder is generally the better choice for making milk chocolate than cacao powder. Milk chocolate is known for its smooth, creamy texture and sweeter, more mellow flavor profile, which aligns well with the characteristics of cocoa.
Nutritional Facts
Nutrition Facts
Servings: 4
Calories
333
% Daily Value*
Total Fat 18.1g
23%
Saturated Fat 10.5g
53%
Cholesterol 3mg
1%
Sodium 90mg
4%
Total Carbohydrate 45.1g
16%
Dietary Fiber 6g
21%
Total Sugars 31.4g
Protein 10g
Vitamin D 0mcg
0%
Calcium 246mg
19%
Iron 2mg
13%
Potassium 80mg
2%
*The % Daily Value (DV) tells you how much a nutrient in a food serving contributes to a daily diet. 2,000 calorie a day is used for general nutrition advice.
What You Will Need To Make Homemade Chocolate
Ingredients
Cacao Powder Or Cocoa Powder
Cacao powder is made from raw cacao beans that have been fermented, dried, and ground, and it has a more intense and bitter flavor than cocoa. Cacao powder is often considered more natural and less processed since it undergoes minimal heating.
In contrast, cocoa powder is derived from roasted cacao beans that undergo processing at elevated temperatures. This process produces a milder flavor than cacao powder and is typically more commonly available in stores.
The choice between cocoa and cacao powder depends on personal preference. If you enjoy a deep, rich, and slightly bitter chocolate flavor, cacao powder might be the better option. However, cocoa can be used instead if you prefer a milder and more familiar chocolate taste.
Sweetener
To sweeten the chocolate, use a natural sweetener like maple syrup, honey, agave syrup, or stevia. Adjust the amount to your preference.
Fat Or Oil
A source of fat or oil is essential to achieve chocolate's smooth and creamy texture. Common options include coconut oil, ghee butter, cocoa butter, or food-grade cacao butter.
Coconut Oil: Coconut oil is popular for making homemade chocolate due to its unique properties and versatility. It is solid at room temperature but melts easily when heated, making it ideal for creating a smooth and creamy texture. When the chocolate sets, the coconut oil helps it solidify and maintain a firm yet melt-in-your-mouth consistency. Nevertheless, it's important to note that using coconut oil can introduce a subtle coconut flavor that might not appeal to everyone.
Ghee Butter: Incorporating ghee butter into your homemade chocolate can impart a distinctive flavor and texture to elevate your creations. Ghee is a type of clarified butter commonly used in Indian cuisine. With its rich, nutty, and caramel-like flavor, using ghee butter can infuse your homemade chocolate with a delightful depth and complexity. The flavor of ghee butter pairs well with the sweetness of chocolate, creating a delightful taste experience.
Cacao Butter: Cacao butter is derived from cacao beans and is typically produced at lower temperatures, preserving more of the natural antioxidants and nutrients found in the beans. It has a distinct chocolate aroma and flavor, giving the chocolate a more intense and pronounced chocolate taste. Cacao butter is often preferred by those seeking a purer and more natural chocolate experience.
Cocoa butter: Cocoa butter is the fat extracted from roasted cacao beans, and it is widely available and commonly used in commercial chocolate production. Cocoa butter has a milder flavor than cacao butter, allowing other flavors to shine in the chocolate. The final product is endowed with a silky consistency.
Optional Add-Ins
You can customize your chocolate by adding chopped nuts, dried fruits, shredded coconut, spices, or extracts. These add-ins provide additional flavors and textures.
Equipment
Heatproof Bowl
Use a microwave-safe or heatproof bowl to melt the ingredients together. Both a glass bowl or a stainless steel bowl are suitable options.
Mixing Utensil
You'll need a spoon or a spatula to mix the ingredients thoroughly.
Chocolate Molds Or Baking Sheet
Depending on the desired shape of your chocolates, you can pour and shape the chocolate using specialized chocolate molds or a parchment-lined baking sheet.
To make homemade chocolate bars, it's best to use a baking sheet or a mold design for chocolate bars.
Refrigerator Or Freezer
You'll need a refrigerator or freezer to allow the chocolate to set and harden.
How To Turn A Chocolate Bar Into Chocolate Chips
You can turn store-bought or homemade chocolate bars into chocolate chips. To turn a chocolate bar into chocolate chips, here is what you need to do:
Break The Chocolate Bar
Use your hands or a sharp knife to break the chocolate bar into small, chip-sized pieces. Aim for pieces roughly the size of chocolate chips or chunks. Depending on your preference, you can break the chocolate into irregular shapes or try to make them more uniform.
Use A Grater Or Food Processor (With A Pulse Function)
Alternatively, you can grate the chocolate bar using a fine grater or pulse it a few times in a food processor. This method will create finer chocolate shavings or smaller chips.
How To Make Chocolate Glossy
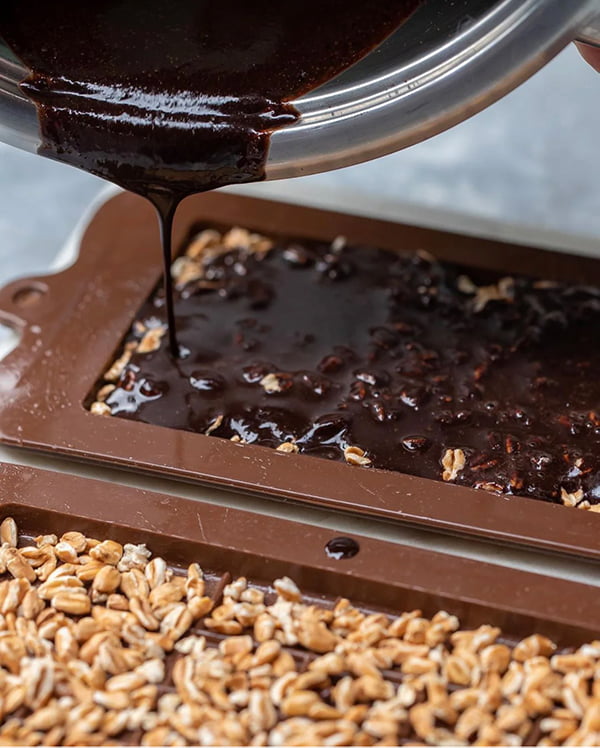
To make chocolate glossy, you have to use tempered chocolate. Tempering chocolate is a process that involves carefully melting and cooling chocolate to stabilize the cocoa butter crystals. Temper chocolate is then pour melted chocolate into a chocolate mold, resulting in a smooth, glossy finish and a firm snap when broken. This technique is not typically part of making chocolate from scratch, where you start with cocoa or cacao products. Still, rather it is a crucial step when shaping and finishing chocolate products, such as chocolate bars, candies, or decorations.
How To Turn A Chocolate Bar into Chocolate Chips
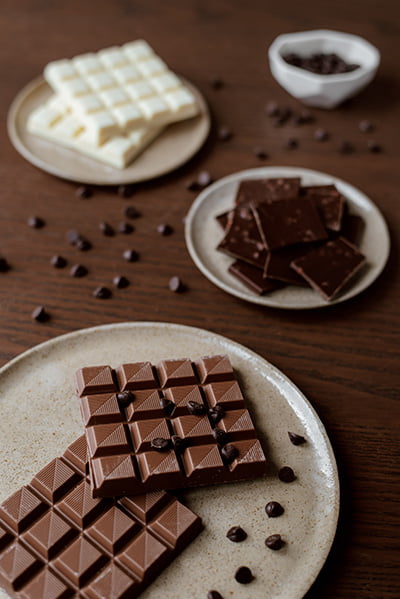
You can turn store-bought or homemade chocolate bars into chocolate chips. To turn a chocolate bar into chocolate chips, here is what you need to do:
Break the chocolate bar
Break the chocolate bar into small, chip-sized pieces using your hands or a sharp knife. Aim for pieces that are roughly the size of chocolate chips or chunks. You can break the chocolate into irregular shapes or try to make them more uniform, depending on your preference.
Use a grater or food processor (with a pulse function)
Alternatively, you can grate the chocolate bar using a fine grater or pulse it a few times in a food processor. This method will create finer chocolate shavings or smaller chips.
How To Elevate Homemade Chocolate Bars
To elevate homemade chocolate bars and take them to the next level of indulgence and creativity, you can try the following tips:
Experiment with flavors
Add exciting flavor combinations to your chocolate bars by incorporating ingredients like sea salt, spices (such as cinnamon, chili powder, or cardamom), extracts (such as mint or almond), or finely chopped nuts, dried fruits, or candied ginger. These additions can add a delightful twist and enhance the taste and texture of your chocolate bars.
Create layers or fillings
Make your chocolate bars more interesting by adding layers or fillings. For example, you can create a two-layer bar with a base layer of one type of chocolate and a top layer of another. Alternatively, you can fill the chocolate bars with caramel, peanut butter, fruit preserves, or even cookie dough for a delightful surprise.
Decorate and garnish
Enhance the visual appeal of your chocolate bars by decorating and garnishing them. You can drizzle melted white chocolate or contrasting chocolate on top, sprinkle edible glitter, crushed cookies, or colorful sprinkles, or even press edible flowers or toasted coconut onto the surface. This adds an aesthetic touch and makes your chocolate bars visually appealing.
Use high-quality ingredients
Opt for high-quality cocoa powder or cacao powder, premium chocolate, and other top-notch ingredients. Using quality ingredients will enhance the overall flavor and ensure a smoother texture in your homemade chocolate bars.
Experiment with different chocolate molds
Play around with different shapes and sizes of chocolate molds to create visually appealing bars. You can find various molds, including traditional rectangular bars, fun shapes, or even individual bite-sized pieces. The mold itself can elevate the presentation and make your homemade chocolate bars look more professional.
Add a touch of sophistication
Elevate your chocolate bars by incorporating sophisticated elements. Consider dusting them with edible gold or silver powder, infusing them with a hint of espresso or liqueur, or adding a layer of tempered chocolate for a glossy finish.
